Inline Viscosity and Density Monitoring for Coil Coating Lines
Coil coating is a high-speed, precision process where fluid properties directly affect coating uniformity and…
Defects in glaze coating are driven by variation in glazing causing color differences, coating thickness variation, cracks. Monitoring and controlling viscosity lead to dramatic drop in defects. Key benefits of glaze density/viscosity management automation:
Over the last few years, the ceramic tile industry has undergone significant changes. For these materials, the manufacturing processes are highly innovative, with a fully automated manufacturing process that yields high quality and productivity.
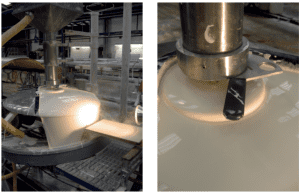
Ceramic tile manufacturers experience a common defect in their manufacturing process that adversely affects the quality of their end product, namely the lack of colour uniformity between tiles of the same model. According to several studies, this defect is caused two ways: First, by an inconsistency in the nature of the materials used in decoration (body, engobes, glazes, inks, etc.) and, second, by improper processing, principally in the application of engobes and glazes, as well as in the decorating and firing processes.
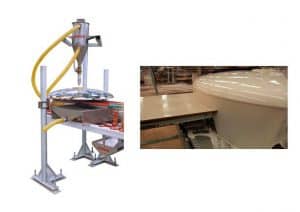
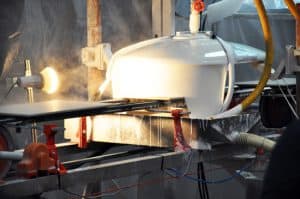
Most current bell glaze feed systems utilize a metallic pipe inside which the glaze is fed using a pumping system through the top, reaching a constant height through an overflow system. The overflow system may come in different forms depending on the manufacturer. A truncated cone mouthpiece at the bottom of this pipe is fitted with a valve that allows manual control of how much glaze go on to the bell, thus adjusting the amount of glaze applied to the tiles. In the immediate vicinity of the valve there is a straight pipe section, whose diameter matches the outlet diameter of the valve, and at the other end of that pipe is a nozzle with a constant diameter, through which the glaze suspension flows onto the bell.
It is typically understood in ceramics that viscosity refers to the degree of fluidity of a slurry, suspension or dilution (for example, ‘shear’ is used when discussing viscosity, whereas engineers understand viscosity as layers of molecules or particles that exhibit friction against each other). The opposing concept of fluidity is viscosity. Slurries that are viscous do not possess fluidity, and are therefore thick. Viscosity is measured by laboratory instruments called viscometers, which provide the result in a unit called a poise. The higher the poise number, the more viscous the slurry.
Color variations, coating thickness variations, and cracks are all caused by variations in glazing. Monitoring and controlling viscosity reduces defects dramatically. Lack of colour uniformity between tiles is often attributable to variations in the discharge flow rate of conventional glaze feed systems for bell application because of variations in the viscosity of the glaze contained in the stirring and pumping tanks. These variations in viscosity, mainly caused by temperature changes in the glaze, cause important variations in the quantity of glaze applied to ceramic tiles, which can lead to colour differences. As shown below, variation in the glaze’s viscosity produces variations in the discharge flow rate due to variations in the mechanical energy losses it experiences as it passes through the feeder.
Bubbles and pinholes
During and after firing, bubbles are always present in a glaze. Nonetheless, if the bubbles are too large and not cured during firing, they will appear as defects on the glaze surface.
Conversely, pinholes are caused by gases from the body, which form larger holes when the glaze is not liquid enough to “heal”.
A suitable enrobe layer thickness can reduce the size of the bubbles that travel through the glaze layer. Then adjusting the molten glaze viscosity can help in one of the two following ways:
Dimples
The orange-peel defect occurs when bubbles cannot escape from a glaze due to high surface tension and viscosity and remain beneath the glaze surface. Cooling will cause the bubbles to shrink, leaving a depression on the glaze surface.
Waviness
A glaze surface with waves is usually caused by high viscosity of the molten glaze, which is unable to expand during firing. Usually, the first solution is to increase the temperature or the soaking time in the kiln, but kaolin is also important. The finer the kaolin, the better the surface smoothness.
The control method used to correct the variations in the glaze flow rate consists of making regular manual measurements (every half hour, in the best of cases) of the grammage applied on to a metallic control plate that is made to cross the glaze curtain created by the bell, so that when the measured glaze quantity departs from the pre-set values, the operator will adjust the valve to increase or decrease the glaze flow rate.
This way of working, given its periodicity, fails to assure application of a consistent quantity of glaze, and leads to defects associated with lack of colour uniformity in the end product.
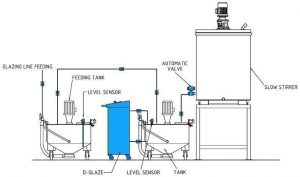
The mixing machine starts with a high-density pre-cursor, which is often at high density of 1.9-2.1 g/cc. This has mixers and valves for controlling various feed. Often density is measured manually or using an inline sensor but viscosity is almost always measured by cup due to unavailability so far of a reliable sensor that gave repeatable measurements.
The mixing machine then adds additives, water and minerals to get the density and viscosity right. General application density is around 1.3 to 1.6 g/cc. Viscosity is what the operators use so far with a ford 4mm cup.
Glaze is a very complex fluid where often the viscosity modifiers used have certain age. They can change in viscosity dramatically over a few hours while density is still the same. This means a glaze can go from being perfectly good for use to unusable. This means the need for proper viscosity control/monitoring is even more critical. One of the components of the glaze is glue which causes big change in viscosity.
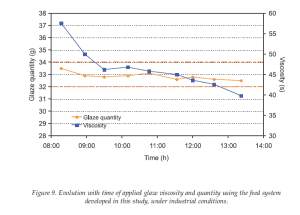
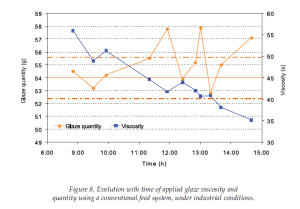
Source: DEVELOPMENT OF A GLAZING SYSTEM INSENSITIVE TO VARIATIONS IN GLAZE VISCOSITY, G. Mallol et. al.
Rheonics sensors are plug and play automation. The inline viscometer can be installed in any tank or pipe with a simple mount. The whole operation of installing the sensor and starting to see real-time measurement of viscosity takes less than 30 minutes. Rheonics sensors have built-in temperature measurement, permitting both viscosity and temperature of the slurry mix to be monitored at all stages as well – from mixing to coating. Viscosity readings can be compensated for temperature, which is essential for ensuring consistent production through typical daily and seasonal temperature variations.
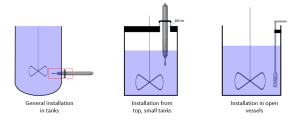

The viscometer is hermetically encapsulated and insensitive to external machine noise – hence performance is unaffected by turbulence and fluid non-homogeneity. Automated online viscosity measurement through SRV or an SRD eliminates the variations in sample taking and lab techniques. The sensor is installed in the mixing/coating tank, continuously measuring the formulated system viscosity (and density in case of SRD). Consistency of the ceramic glazing fluid is achieved through automation of the dosing system through a process controller based on real-time viscosity, and temperature measurements.
During slurry preparation process prior to coating (and even during coating by dipping), the mixing process can be monitored with Rheonics sensors, which can verify if solids content & homogeneity (stability) are optimal, without worrying about a myriad of factors which might affect them. Inline viscosity management with the Rheonics sensors can help alleviate most common issues like color differences, coating thickness variation, cracks that can negatively impact the quality of final products.
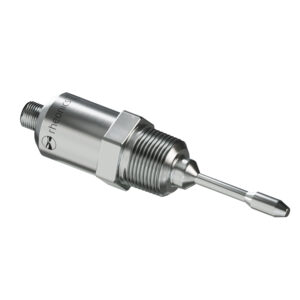
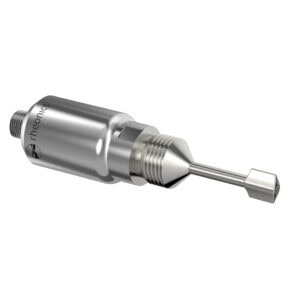
Rheonics offers an integrated standalone viscosity, density and pH monitoring and control system. The Rheonics Slurry Monitoring and Control system uses inline viscometers and inline pH probes to monitor slurry viscosity, temperature and pH in real-time. Correction valves are operated to add the correct dose to ensure absolute control of the slurry characteristics through-out the mixing and coating process.
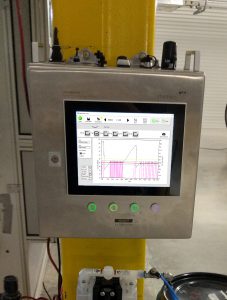
As manufacturers seek to become more agile in adapting to industry’s requirements, they understand the need to invest in R&D activities and advanced process control technologies to develop new formulations with tailored characteristics. Rheonics inline viscometers empower manufacturers with capabilities for glazing operations of top quality and a great variety, with least involvement of operators on factory floor – a significant advantage over other measurement alternatives or process control solutions. Data provided by the Rheonics viscometers and integrated solutions helps to accelerate learning curves and accommodate more frequent slurry composition changeovers, contributing to a more resource-efficient, economical and greener manufacturing process. Inline blending with continuous viscosity monitoring solutions solves major challenges of batch production processes such as losses during product changeovers and inefficacies of material handling in a recipe-based approach. It supports scaling up of operations with ease.
Unique benefits with the Rheonics inline online viscometer SRV and density meter SRD for ceramic glaze mixing and coating applications include:
Rheonics designs, manufactures and markets innovative fluid sensing and monitoring systems. Precision built in Switzerland, Rheonics’ in-line viscometers and density meters have the sensitivity demanded by the application and the reliability needed to survive in a harsh operating environment. Stable results – even under adverse flow conditions. No effect of pressure drop or flow rate. It is equally well suited to quality control measurements in the laboratory. No need to change any component or parameter to measure across full range.